Wooden bird feeder
Use a few testpots of Resene Waterborne Woodsman to transform a kitset wooden birdfeeder from drab to fab.

Ways with wood with Mark Rayner - Project 15
Difficulty level: Easy
You will need: a DIY kitset wooden bird feeder, exterior PVA glue, hammer, paintbrush, Resene testpots of Resene Waterborne Woodsman penetrating oil stain in the following colours: Resene Bamboo, Resene Rangitoto and Resene Totem Pole.
To get the look: Mark fixed the bird feeder onto an old weathered fence post with exterior construction glue.
Other ideas: To make the bird feeder blend into the surrounding garden, stain it with a natural brown Resene Waterborne Woodsman stain such as Resene Dark Oak or Resene English Walnut.

Step one
Assemble the sides and base of the bird feeder, fixing with nails provided and exterior PVA glue.

Step two
Assemble the front and back panels of the bird feeder, as shown.

Step three
Paint the inside of the birdfeeder with one coat of Resene Rangitoto.

Step four
Paint the underside of the roof panels with one coat of Resene Rangitoto. Leave to dry for 24 hours and apply a second coat of Resene Rangitoto.

Step five
Once touch dry, assemble the roof panels, as shown.

Step six
Paint the sides of the bird feeder with one coat of Resene Bamboo.

Step seven
Paint the underside, front and back panels of the bird feeder with one coat of Resene Bamboo.

Step eight
Paint the roof panels with one coat of Resene Totem Pole. Leave to dry for 24 hours and apply a second coat of Resene Bamboo and Resene Totem Pole. Allow 24 hours to dry before positioning birdfeeder outside in the garden.
Other projects you might like to try
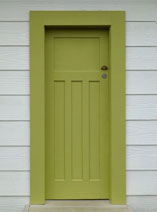
Painted front door
Weekend DIY

Two-colour feature wall
Weekend DIY

Wooden floors
Ways with wood

Revamp a deck
Ways with wood

Pallet playhouse
Weekend Gardener

There she blows
Weekend Gardener