Chest of drawers
It’s easy to transform an old wood veneer chest of drawers into a thing of beauty using Resene Danska Teak Oil.

Ways with wood with Mark Rayner – 49
Difficulty level: Moderate
You will need: a clamp, clean lint-free cloths, latex gloves, methylated spirits, old wood veneer chest of drawers (ours was oak veneer), paintbrush, pliers or screwdriver for removing drawer handles, pva glue, sanding block, sandpaper (medium and fine grade), turpentine for washing brush, two small pieces of plywood and Resene Danska Teak Oil.
To get the look: Mark painted the background wall with Resene SpaceCote Flat tinted to Resene Pale Prim.
Other ideas: For a paler whitewash finish try Resene Colorwood Whitewash.

Step one
Remove drawers from the unit and apply a small amount of PVA glue under any parts of the veneer which may have lifted. Take care not to get any glue on the front surface of the veneer.

Step two
Clamp between two small pieces of plywood and allow the glue to dry.

Step three
Remove the handles from each of the drawers and put to one side.

Step four
Lightly sand the veneer with a medium grade sandpaper, rubbing in the direction of the grain. Wipe off any sanding dust with a clean cloth and then lightly sand the veneer with a fine grade sandpaper.

Step five
Lightly wipe off any sanding dust with a clean cloth dampened with methylated spirits. Allow to dry.

Step six
Apply one coat of Resene Danska Teak Oil to the chest of drawers, brushing in the direction of the grain.

Step seven
Wearing latex gloves, wipe off any excess Resene Danska Teak Oil and allow to dry for 24 hours. If necessary repeat steps six and seven.

Step eight
Reattach the drawer handles and slide drawers back into the unit.
Other projects you might like to try
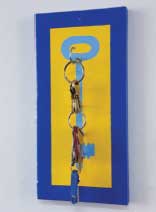
Key hanger
Weekend DIY

Kitchen memo board
Weekend DIY

Wooden bookend
Ways with wood

Breakfast place setting
Ways with wood

Ways to water pots
Weekend Gardener

Pot ladder shelves
Weekend Gardener