How to build a plant pot trellis
DIY project from NZ Gardener magazine
This project can be made for inside or outside use, and would be ideal for a herb garden.

You will need
Materials:
- 36mm x 12mm timber slats or reclaimed timber as required
- 28 x 20mm screws
- Wall or fence fixings
- Paint
Cut list:
- 4 slats 1440mm in length
- 6 slats 840mm in length
These sizes can be adjusted to suit your space requirements.
Tools:
- Measure tape and pencil
- Mitre saw or hand saw
- Square
- Drill with bit and square bit
- Paintbrush
Cost: $75 for timber slats, fixings, and plant pots. This excludes Resene products. I used Resene Woodsman Penetrating Oil Stain in Pitch Black.
Health and safety: When using power tools, always wear goggles and ear defenders, and ensure all jewellery is tucked away, hair tied back and don’t wear loose clothing that may get tangled.
Instructions
 Step 1
Measure up your space for the size of the trellis you would like.
 Step 2
Cut timbers to your desired size. I have cut 4 slats at 1440mm and 6 at 840mm.
 Step 3
Stain the timbers on each side. Coating each side helps to prevent the timber from warping. I used Resene Woodsman Penetrating Oil Stain in Pitch Black.
 Step 4
Lay out the timber slats and measure out evenly space them.
 Step 5
Pre-drill for the screw hole, and fix together with the 20mm screws from the back side to avoid having the fixings showing on the front.
 Step 6
Install your trellis to your wall or fence.
 Step 7
Attach your plant pots by screwing them directly on to the trellis. These white pots hang directly on the rail.
 Step 8
Your plant pots are now ready to be planted with your choice of plants.
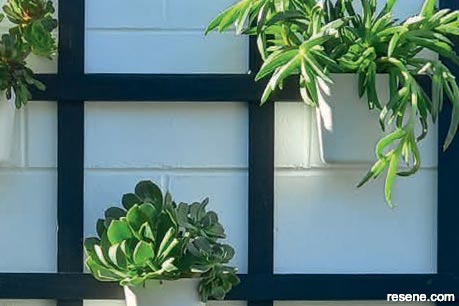 Close up
A close up of completed project.
Project by: Jane Horne
Jane Horne and partner Simon Bartholomew design and develop projects from their studio in Christchurch, managing projects throughout the South Island.