How to make Christmas light boxes
DIY project from NZ Gardener magazine
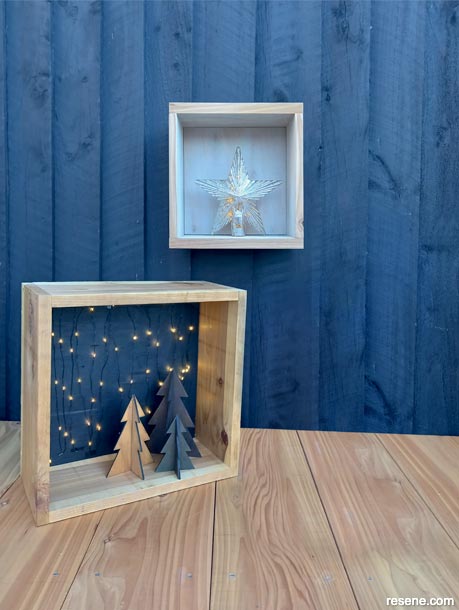
A seasonal project to hang in your garden or by your front door for a festive welcome.
You will need
Materials:
- 1.4 linear metres of 200mm x 25mm treated timber, cedar, macrocarpa or reclaimed timber
- 4mm exterior plywood
- 20 x 50mm stainless steel screws
- 4 x tacks (or glue)
- Staples or PVC sticky tape
- String of lights available from most hardware and lighting stores. Get the correct lights for indoor or outdoor use depending on where your light box will be placed.
- Your choice of Resene finish
Tools:
- Measure tape and pencil
- Mitre saw or hand saw
- Sliding square
- Drill with 4mm bit and square bit
- Stapler if required
- Paintbrushes
Cut-list: The measurements used in this project
- 2 pieces at 400mm of 200mm x 25mm timber
- 2 pieces at 360mm of 200mm x 25mm timber
- 4 pieces of right angles triangles 90mm x 90mm
- 1 piece at 360mm x 3600 of 4mm exterior plywood
These sizes can be adjusted to suit your requirements.
Cost: $50 for timber, fixings and lights. This excludes Resene products.
Instructions
 Step 1
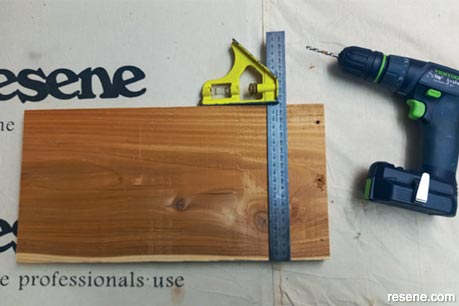
Measure and cut your timbers to size using a mitre saw or handsaw.
 Step 2
Measure 12mm in from the short edge of the 400mm boards. Mark out for three screw holes and pre-drill.
 Step 3
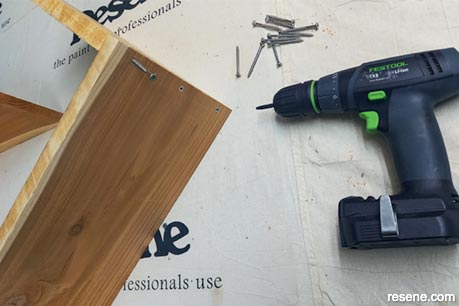
Using the 50mm screws, screw together the edge of the 400mm boards to the 360mm boards to create the frame.
 Step 4
At the back of the frame, measure out 60mm from each corner, pre-drill and screw the triangle pieces in to place.
 Step 5
Stain, oil or paint. I used Resene Exterior Furniture & Decking Oil in clear for the frame, and Resene Woodsman Penetrating Oil Stain in Pitch Black for the back board.
 Step 6
Add your lights. I used staples and black PVC sticky tape to secure mine.
 Step 7
You may have to make a small notch at the bottom centre of the back board for the lights wire before placing the frame. Screw, tack or glue the board in to place on the triangle pieces. Finally (Step 8), decorate with your Christmas ornaments.
 Finished project
A close-up of the finished project.
Project by: Jane Horne
Jane Horne and partner Simon Bartholomew design and develop projects from their studio in Christchurch, managing projects throughout the South Island.