How to make rustic garden stools
DIY project from NZ Gardener magazine
This simple, quick project creates a stylish outdoor seating option.

You will need
Materials:
- 2.4m macrocarpa sleeper 200mm x 50mm (dressed, if possible)
- 1.8m macrocarpa 100mm x 25mm (dressed, if possible)
- 8 x 100mm landscaping screws or bugles
- 16 x 75mm stainless steel screws or decking screws
- Your choice of Resene finishes
Cut List:
- 4 x 200mm x 50mm at 430mm
- 4 x 100mm x 25mm at 450mm
- 1 x 200mm x 50mm at 350mm
Tools:
- Sander and sandpaper
- Measure tape and pencil
- Sliding square
- Mitre saw or hand saw
- Exterior wood glue and clamps
- Drill or impact driver
- Bugle drill bit, square head or torx head drill bit to suit your 75mm screws
- 8mm drill bit and 4mm drill bit
- Paintbrushes
Cost: $40 for timber and fixings This excludes Resene products. I used Resene Exterior Furniture and Decking Oil.
Instructions
 Step 1
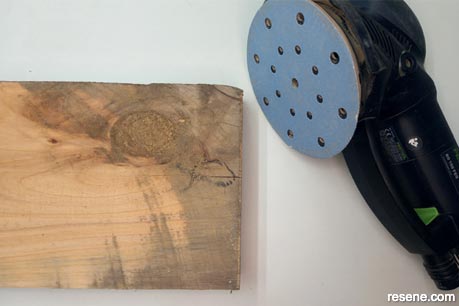
Using the sander, sand the timber to a smoother finish, or your local timberyard may be able to supply dressed timber. Another option is to leave it rough sawn for a more rustic look.
 Step 2
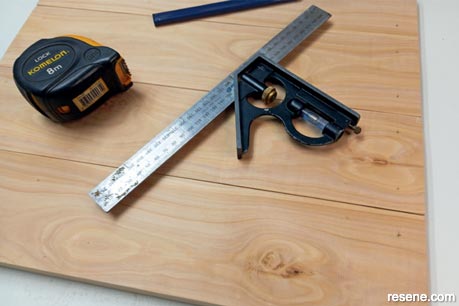
Measure your timbers and mark up. Cut your timbers to size using a drop saw or hand saw.
 Step 3
To make the legs, glue two of the 200mm x 50mm timbers together, and wait to dry.
 Step 4
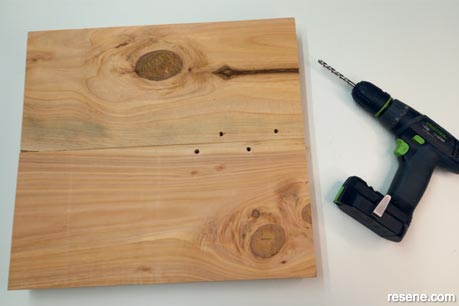
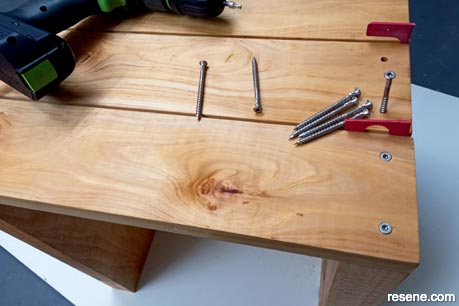
When the legs are ready, measure 40mm down and 120mm down from the centre and 15mm in, and on the side 80mm and 160mm down. Pre-drill using the 8mm drill bit.
 Step 5
Put your leg timbers upside down on a level surface and place the centre piece in the middle, and bugle into place. This will give you the basic frame of the legs.
 Step 6
With the 100mm x 25mm timbers, measure 25mm in from each end and mark up on each corner. Pre-drill with the 4mm drill bit.
 Step 7
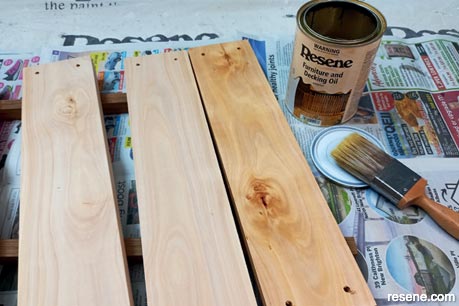
Finish with your choice of Resene products. I wanted a natural look and to enhance the macrocarpa timber, so used Resene’s Exterior Furniture and Decking Oil. Wait for it to dry.
 Step 8
Fix the 100mm x 25mm timbers to the top of the frame using your decking or stainless steel screws. I used some plastic spacers to get the slats even. Your stools are ready to use
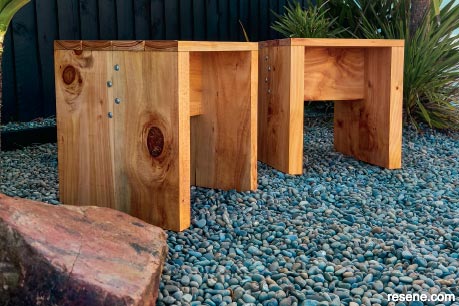 Finished project
A close-up of the finished rustic garden stools.
Project by Jane Horne
Jane Horne and partner Simon Bartholomew design and develop projects from their studio in Christchurch, managing projects throughout the South Island.