How to make flat pack Xmas trees
DIY project from NZ Gardener magazine
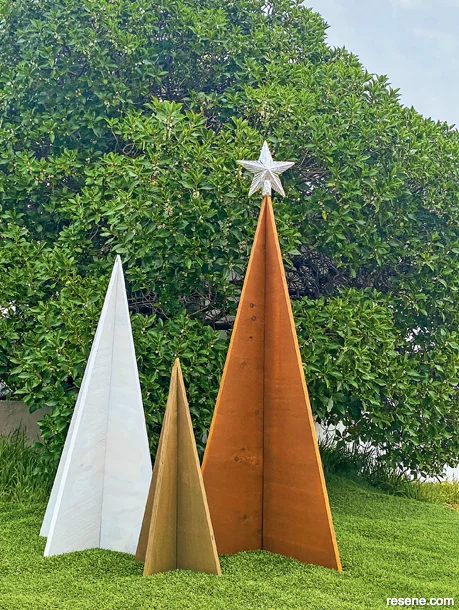
These understated Christmas trees can be packed away after the festive season, ready for use again next year.
You will need
Materials:
- 18mm exterior plywood
- Your choice of finishes
Tree measurements:
- Large tree: Height 1200mm x base 600mm
- Medium tree: Height 900mm x base 450mm
- Small tree: Height 600mm x base 300mm
Tools:
- Measuring tape, metal ruler and pencil
- Track saw or jigsaw
- Sandpaper
- Coping saw
- Chisel
- Hammer
- Paintbrushes or cloths
Cost: $115, excluding Resene products. I used Resene Woodsman Penetrating Oil Stain Exterior in Limed Gum, Whitewash and Nutmeg.
Instructions
 Step 1
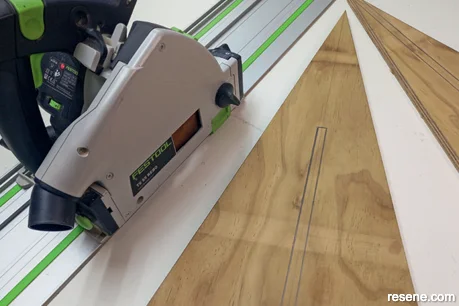
Decide on the size of the tree that is appropriate for the space you want it in, and cut your timber to the approximate size for easier handling. Measure and mark out for the Christmas tree design: Mark out a centre line and mark 600mm in height. From each corner, measure 150mm on each side, and measure up to your 600mm mark. This will make the triangle shape needed.
 Step 2
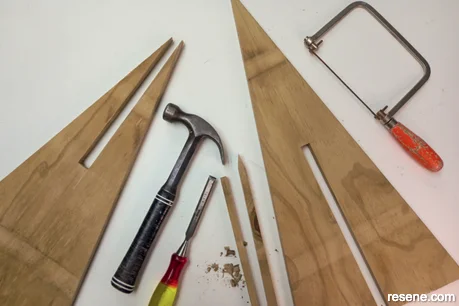
Mark out an 18mm slot on the centre line, so there is 9mm on each side of the line. This should be 300mm long on alternate ends of each triangle shape.
 Step 3
Using your track saw or jigsaw, cut out each triangle shape.
 Step 4
Using your track saw or jigsaw, cut out each slot. Use the coping saw and chisel to remove the end piece.
 Step 5
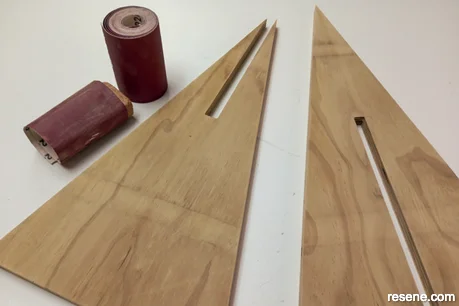
Sand both pieces thoroughly to remove any sharp and rough edges. Remove any residual dust.
 Step 6
Stain every side of the plywood using a brush or cloth. I used Resene Exterior Stain in Limed Gum. Allow to dry. Slot the pieces together.
Project by Jane Horne
Jane Horne and partner Simon Bartholomew design and develop projects from their studio in Christchurch, managing projects throughout the South Island.