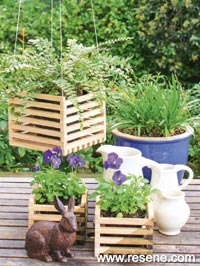
How to make Jenga planters
DIY project from NZ Gardener magazine
Rose Hughes takes a playful approach to displaying potted plants.
You will need:
- 10mm x 10mm dressed pine
- Wood glue
- Cord for hanging plante
- Drill bit
- Hand saw / drop saw
- Sandpaper
- Optional: paint and masking tape
Cost: $15 excluding paint.
Instructions
 Step one
 Cut the pine to the required lengths. Small planter: 23 x130mm. Hanging Planter: 33 x180mm. Drill small holes 5mm in from each end on all but seven of the lengths for the hanging planter.
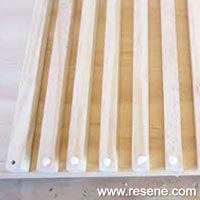 Step two
 Form the base by laying the two pieces with drilled ends with the long edge of one against a guide and the other 180mm away. Evenly space seven of the undrilled lengths between them. Add a spot of glue to each and lay a length across each end. Clamp and let dry. For the smaller planter there will be no drill holes and only seven lengths to form the base.
 Step three
 Turn the base over so the two ends are to the top. For the hanging planter cut cord into four suitable lengths. Tie a knot in one end and thread each through corner. Continue stacking the pieces and threading the string through the holes. Tie a knot close to the top to hold the edges tight. For the table planter continue the layering with a spot of glue at each join. Allow to dry and sand well.
 Step four
I had enough paint (I used Resene Woodsman Wood Oil Stain Shadow Match) left to dip the smaller planters as a way of adding interest. Pour the paint into a suitable bowl, mask the planters and dip evenly up to the masking tape. Allow to dry, remove the masking tape and sand back any marks.
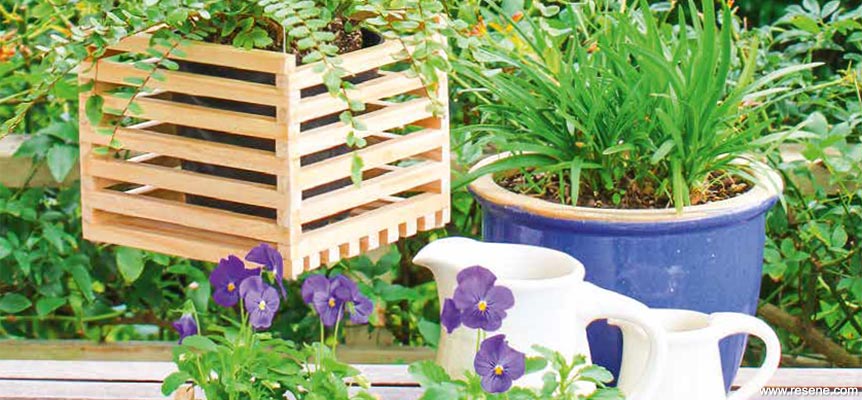
Finished planters