How to make a spherical planter
DIY project from NZ Gardener magazine
Jacob Leaf sculpts a ball-shaped planter out of mortar and a balloon.

You will need
- Disposable gloves
- Thick foam sponge
- Fast-setting mortar (I used Cemix Quick Patch, which is enough to make about five pots)
- Old bucket or container
- Water
- Cotton buds
- Round balloons (make sure the packet specifies that they’re round, not oval)
- Paintbrush
- Painter’s masking tape
- Resene Quick Dry Primer
- Resene test pots (I used Resene Metallics Magma)
Cost: $45 excluding paint.
Instructions

Step one
Step two
Step three
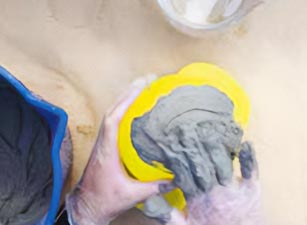
Step one: Create a concave hollow in the sponge large enough to cradle the balloon as you apply the mortar. Blow the balloon up to your desired size and place it, tied end down, into the concave hole. Or make a small hole that goes through the sponge and pull tied end of the balloon through.
Step two: Mix up mortar and water until you have a thick icing-like consistency. Wearing gloves, apply mortar to the top half of the balloon (which will eventually end up as the bottom of your pot). Feather out the edges onto the exposed half of the balloon.
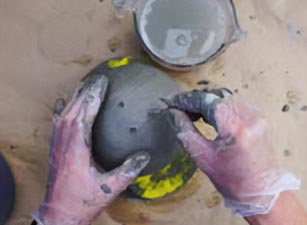
Step three: Wet your gloved hands and smooth out the mortar. Without popping the balloon, gently create two or three drainage holes in the top of the mortar shape with a cotton bud. Leave to set.
Step four

Step five

Step six
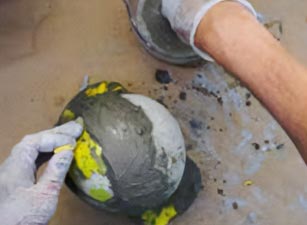
Step four: Once set, remove the balloon from the sponge, turn it over and apply more mortar mix to the top end of the balloon. Create an interesting opening, then feather the wet mortar over the dry feathered mortar to maintain a consistent thickness. Smooth out the wet mortar with wet gloved hands. Leave to dry.
Step five: Pop the balloon, then add a layer of mortar to the inside of the pot to strengthen it. Make sure the drainage holes are clear of mortar before it sets.
Step six: Prime and paint your pot. Remember to use painter’s masking tape if you want to paint sections of the pot.
Project by: Jacob Leaf
› Download a PDF of this project › Watch a video of this project