How to make fire pit rockery
DIY project from NZ Gardener magazine
Keeping warm on winter nights while enjoying your garden.

You will need
Materials:
- 4 x lengths at 1200mm or 50mm x 20mm batten in exterior timber, macrocarpa or similar
- 8 x 50mm stainless steel screws
- Black plastic or weedmat
- 600mm fire pit bowl
- 4 x 20kg of fine gravel
- 4 x 20kg of rocks of your choice. I used river stones
- Large rocks and stones
- Resene testpot in your colour of choice.
Tools:
- Measuring tape and pencil
- Drop saw or handsaw
- Sliding square
- Drill and drill bits
- Rake
- Spade
- Spirit Level
- Paintbrushes
Cost: $160, excluding Resene products. I used Resene Quick Dry Exterior Primer and a test pot of Resene Grenadier.
Health & Safety: Your fire pit must be away from buildings, sheds and over hanging trees. Check the Fire & Emergency NZ website for more safety information. As well, check with your local authority regarding outdoor fire rules. Never leave a fire unattended, and always have water on hand.
Instructions
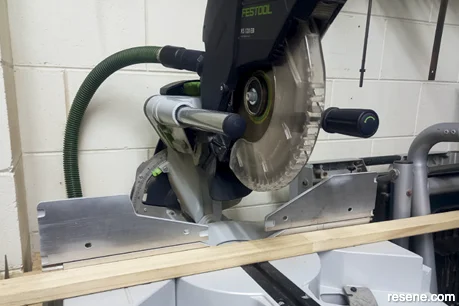 Step 1
Measure your timber batten to 1200mm in length and cut to size using a drop saw or handsaw.
 Step 2
Prime and paint each batten piece on all surfaces following the manufacturers instructions. I used Resene Quick Dry Exterior Primer and Resene Grenadier.
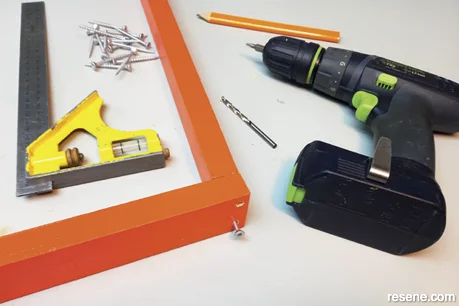 Step 3
On one end of each batten, measure 10mm in and 10mm down and predrill two holes. Screw the battens together to create a square frame for the rockery edging.
 Step 4
Lay your frame in your chosen location. Using this as a guide, use your spade to dig around the frame. Remove the frame and dig approximately 70-100mm deep and remove all turf and dirt. Level out with your rake and compact down with your feet.
 Step 5
Lay out your weedmat, and fill the square with the fine gravel and compact with your feet.
 Step 6
Place the frame onto the gravel square, and fill with your choice of stones. Arrange your large rocks and stones in the centre for the base for your fire pit bowl. Carefully place your fire pit bowl on to the rocks and ensure it is stable. Check it is even on each side with your spirit level. Your fire pit is ready to use.
Project by Jane Horne
Jane Horne and partner Simon Bartholomew design and develop projects from their studio in Christchurch, managing projects throughout the South Island.