creating a wood-effect paint finish
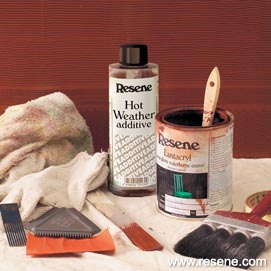
You will need:
- P220 grit sandpaper
- Resene Hot Weather Additive
- Resene Lustacryl waterborne paint
- Paint brushes (size to correspond with job at hand)
- Rubber grain-effect combs, clean rags and water
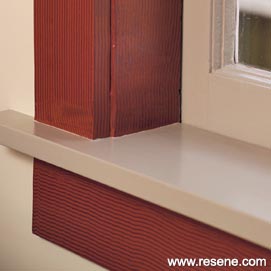
To achieve this cedar look, we used Resene Aubergine and Resene Hairy Heath. Any combination of colours can be employed.
 Step one
 Prepare all surface areas by washing, sanding and, where necessary, filling any holes or imperfections, then apply Resene Quick Dry acrylic primer undercoat and allow to dry.
 Step two
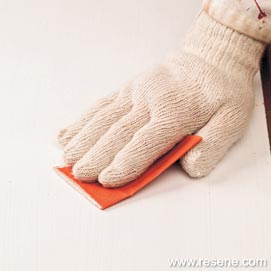
 Use a fine grade sandpaper – p220 is best – to smooth off the finish. Dust clean.
 Step three
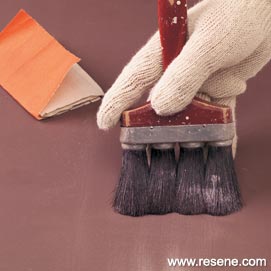
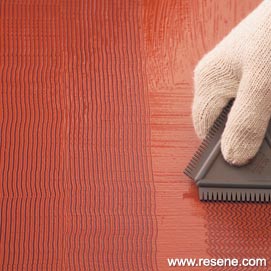
 Next comes the first topcoat. Apply using a crow’s foot technique to achieve a criss-cross finish. Smaller surfaces need only be painted in one direction.
 Step four
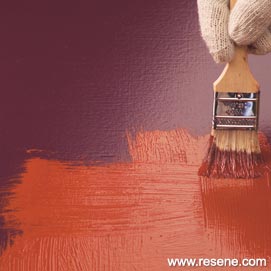
Add Resene Hot Weather Additive into your second topcoat colour to increase drying time and allow more ease of manipulation with the comb. Employ the same crow’s foot – criss-cross – brushstrokes to ensure a smooth, even finish.
 Step five
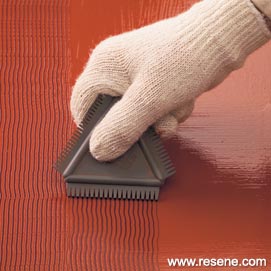
After painting, with a steady hand, draw the comb across the surface to create your desired effect.
 Step six
The added Resene Hot Weather Additive should ensure you have a reasonable amount of working time to create grain effects. Leave to dry for at least 24 hours.
Step seven - FinishedWhen completely dry, seal the combed surfaces with a coat of Resene Aquaclear satin. This will provide a durable wearing surface and soften the appearance of combed areas, creating a more natural effect.
 You will need
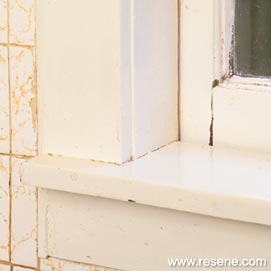 Before


words: Keri Bridgwater
pictures: Mark Heaslip