How to make a Christmas tree forest
Habitat bright ideas with Fleur Thorpe – DIY projects
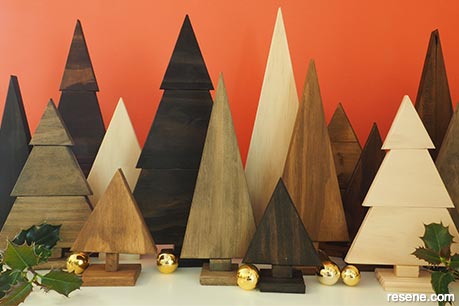
Brighten up a spare space on top of a dresser, mantelpiece or display shelf with a forest of Christmas trees, stained or painted to suit your Christmas colour palette.

Wall painted in Resene Rapture. Colour of trees, left to right – Resene Colorwood in Resene Ebony, Resene Touch Wood, Resene Teak, Resene Rock Salt, Resene Matai, Resene Ebony, Resene Touch Wood, Resene Rock Salt, Resene Ebony, Resene Matai, Resene Matai, Resene Teak, Resene Rock Salt, Resene Teak, Resene Touch Wood.
You will need
- Scrap wood (Fleur used untreated pine)
- Mitre saw
- Sandpaper
- Resene Colorwood stains in your choice of colours, Fleur used: Resene Colorwood in Resene Ebony, Resene Touch Wood, Resene Matai, Resene Teak, Resene Rock Salt
- Cloth/rag
- Rubber/silicon gloves
- Wood glue
Instructions
Top tip: For a brighter effect paint your trees in Resene solid colours or Resene FX Metallic finishes using Resene testpots.
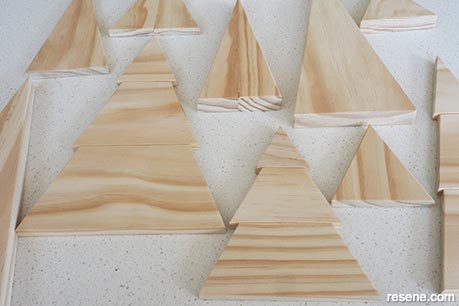 Step 1
For this project Fleur used some scrap untreated pine wood but you could use any wood. Start by cutting your wood into tall triangles and tree shapes. Sand down any rough edges with some medium grit sandpaper. Wipe off sanding dust. Use wood glue to glue any trees that are made of multiple pieces together. Take care not to get any glue on the front face as the wood stain won’t adhere to it as well.
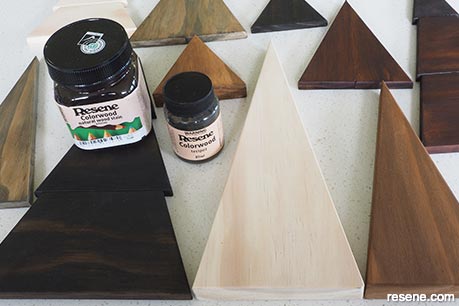 Step 2
Use a soft, lint-free cloth to rub the stain on to the trees. Fleur used Resene Colorwood in Resene Ebony, Resene Touch Wood, Resene Matai, Resene Teak and Resene Rock Salt. It’s a good idea to wear rubber/silicon gloves for this job. Fleur did two coats of Resene Teak and Resene Rock Salt and one coat of Resene Matai, Resene Touch Wood and Resene Ebony.
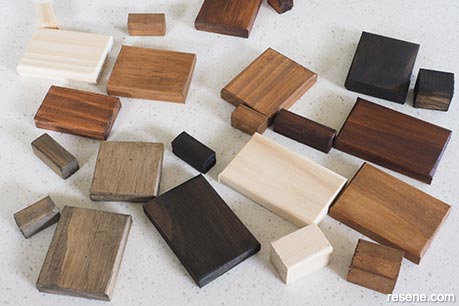 Step 3
Cut out some small bases and ‘trunks’ from some more scrap wood. Stain these the same colours as the trees.
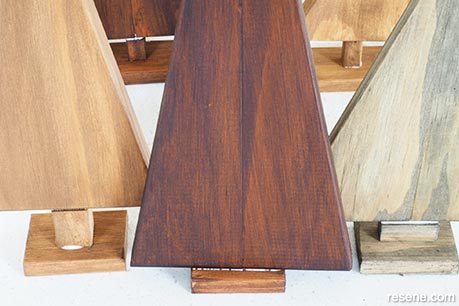 Step 4
Use wood glue to attach the base and trunks to the trees. Allow the glue to dry for a couple of hours.
 Step 5
If you want a slightly more glossy finish, rub on some Resene Danska Teak Oil.


Styling and images by Fleur Thorpe. Nov 2021.