How to transform a garden arch
Transform a humble kitset garden arch into an elegant garden feature with Resene Timber and Furniture Gel.

Ways with wood with Mark Rayner - Project 22
Difficulty level: Moderate
You will need: a clean lint-free cloth, kitset timber garden arch, latex gloves, paintbrush, paint stirrer, screwdriver and a small adjustable spanner. Resene Timber & Furniture Gel tinted to Resene Jarrah Tree.
To get the look: Mark stained the background fence with Resene Waterborne Woodsman tinted to Resene Bamboo and painted the retaining wall with Resene Lumbersider tinted to Resene Pale Prim.
Other ideas: For a lighter effect, stain the arch with Resene Timber & Furniture Gel tinted to Resene Kwila.
Instructions

Step one
Gently stir the Resene Timber and Furniture Gel with a paint stirrer.

Step two
Apply Resene Timber and Furniture Gel to the main struts and larger pieces of the kitset garden arch using a clean lint-free cloth. Rub in the direction of the grain to assist penetration.

Step three
Use a paintbrush to get the Resene Timber and Furniture Gel into any awkward grooves, as shown.

Step four
Apply Resene Timber and Furniture Gel to both sides of the trellis panels, using a paintbrush. Allow to dry for one hour.

Step five
Apply a second coat of Resene Timber and Furniture Gel to the entire kitset arch, removing any excess with a clean lintfree cloth, and allow to dry for one hour.

Step six
On a flat surface such as a concrete patio or deck, assemble the two side panels following the manufacturer’s instructions, as shown.

Step seven
Again, be sure to follow the manufacturer’s instructions to assemble both sides of the overhead arch section and tighten the nuts and bolts with a screwdriver and spanner.

Step eight
Fix the side panels to the overhead arch section in thet same way, tightening the nuts and bolts with a screwdriver and spanner.
Other projects you might like to try
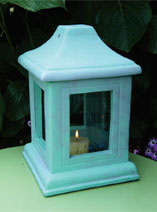
Verdigris candle holder
Weekend DIY

Framed memo board
Weekend DIY

Waste paper bin
Ways with wood

Border edging
Ways with wood
One for the birds
Weekend Gardener
Succulent planter
Weekend Gardener