Metal mirror
Use Resene metallic paint and ordinary washers to create a cool contemporary framed mirror.

Resene art with Mark Rayner - Project 15
Difficulty level: Moderate
You will need: 28 x 30mm round stainless steel or galvanised washers, 300mm x 300mm mirror tile, 4 x 50mm square stainless steel or galvanised washers, artists’ brushes, paint tray/roller, pencil, piece of 17mm plywood measuring 400mm x 400mm, PVA glue, Resene Enamacryl Metallic (now Resene FX Metallic) tinted to Resene Scotty Silver, Resene Galvo One primer, Resene Lumbersider tinted to Resene Heather, Resene Quick Dry waterborne primer undercoat, Resene Sandtex, Resene Multishield+ (now Resene Concrete Clear) gloss, ruler.
To get the look: Mark painted the surrounding wall with Resene SpaceCote Low Sheen tinted to Resene Bismark.
Other ideas: Go over the top and try a sumptuous gold effect using Resene Enamacryl Metallic (now Resene FX Metallic) tinted to Resene Bullion.

Step one
Rule a pencil line 50mm in from each edge of the plywood board and glue a square washer into each corner with PVA glue. Glue the remaining round washers into position, ensuring that they are evenly spaced, as shown.

Step two
Using an artists’ brush, paint each washer with one coat of Resene Galvo One primer. Allow to dry.

Step three
Using an artists’ brush, apply one coat of Resene Quick Dry waterborne primer undercoat to the surrounding plywood and edges of the board. Allow to dry for one hour.

Step four
Using a large artists’ brush and stippling technique, apply one coat of Resene Sandtex, as shown. Allow to dry for 2 hours.

Step five
Apply one coat of Resene Heather over the textured edge, as shown. Allow to dry for 2 hours.

Step six
Using a small roller, apply two coats of Resene Scotty Silver, allowing two hours drying time after each coat.

Step seven
Using a large artists’ brush apply three coats of Resene Multishield+ (now Resene Concrete Clear) gloss, allowing two hours drying time after each coat.

Step eight
Glue the mirror into position with PVA and let the glue dry before hanging.
Other projects you might like to try
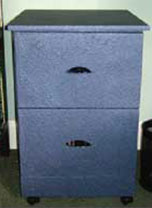
Metallic filing cabinet
Resene art
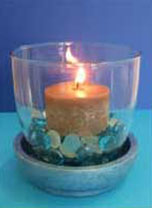
Glass candle holder
Resene art
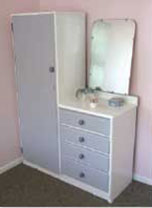
Dressing table
Resene art

Garden gate
Weekend DIY

White wooden box
Ways with wood

Green seed drawers
Weekend gardener