Stilts
These easy-to-make stilts are perfect for some outdoor summer fun.

Resene Toys and Games with Mark Rayner - Project 13
Difficulty level: Moderate
You will need: Tape measure, 50mm x 50mm timber cut to two 1.8m lengths, 50mm x 100mm timber cut into two 140mm pieces, 100mm nails, Hammer, Paintbrush, Paint stirrer, Pencil, Resene Quick Dry, Resene Lustacryl tinted to Resene California, PVA glue, Sandpaper, Saw
To get the look: Mark stained the background deck with Resene Kwila Timber Stain.
Other ideas: These timber stilts could also be stained with any colour from the Resene Woodsman penetrating oil stain range.

Step one
Measure and mark the timber to the lengths listed above.

Step two
Using the pencil lines as a guide, cut the timber to the lengths marked.

Step three
Smooth any rough edges with sandpaper.

Step four
Position each of the ‘footholds’, as shown, approximately 500mm from the base of each stilt ‘upright’. Fix with nails and PVA glue. Allow glue to dry.


Other projects you might like to try

Walk tall
Kids art projects
Sparkle time
Kids art projects

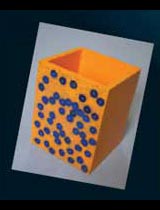
Bullseye!
Kids art projects
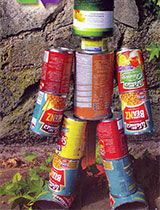
Tin can man
Kids garden projects
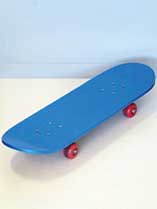
Metallic skateboard
Toys and games

String puppet
Toys and games